I found these plans for this shop cart at Woodsmith.com after watching the video on their TV show. It is pretty handy to have in the shop for a little extra table space and the table saw extenders. I used it recently to rip some long boards on my table saw and the extenders (on the sides of the cart) work great once you have them setup properly.
The plans are very well done which is what you would expect from the Woodsmith people. The cart is made out of ¾ inch MDF and regular construction lumber (fir). It is not too expensive to make and goes together pretty well.
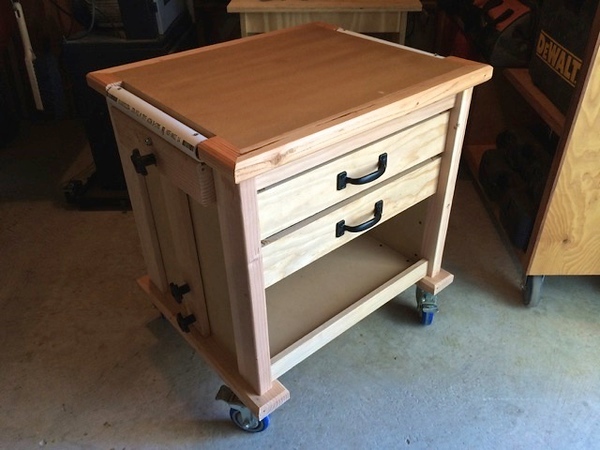
Once you get the bottom, back and sides done you put castors on the bottom. I bought good quality castors from Rockler. After building a top and face frame it is on to the drawers. I am not very skilled at drawer building, but I am getting better. The plans call for full extension drawer slides, but I do not really need that so I used ¾ extension slides which worked really well. Most of the major pieces have a chamfer on the edges.
The plans call for two drawers and a holder for clamps. As you can see from the photos I put the drawers up top and left a space at the bottom for the clamps or possibly another drawer, have not made up my mind yet on that.
The sliding supports on the sides are made out of T-Track (Rockler), knobs (Rockler) and 1¼” PVC pipe (Home Depot). The PVC sits flush with the top. When you need some extra extension on the table saw for ripping long boards just wheel the cart over and pull up the sliding extensions. They work great and are easy to use. They were not easy to make though, you have to mount the T-Track and get the holes for the knobs just right.
I put handles on the drawers to complete the cart. Once done I put a few coats of sealer on the top area. The plans do not call for this, but if I spill something it will be easier to clean up for sure.
My cart is not as nice as Woodsmith’s, but I cannot afford to by high quality Douglas Fir. So, I selected the best pieces I could find at Home Depot and tried to cut around all the bad spots. All in all it came out pretty well.
This is going to be a very useful addition to my shop. I can use the extensions at the table saw and the top surface for working on various items. Already have some “stuff” in the drawers.
Here is a link to the plans. You have to sign up to get them, but it is worth it. Be sure and check out the photo gallery of the production process.
Doug