My shop is housed in my garage. I live in Colorado and the winters here can be pretty cold at times. When it is super cold I just don’t do any woodworking in my shop, it’s too nasty out there. Yes, I have a heater, but sometimes the cold overcomes the heater. Enter my workbench project for my basement! After considerable research I purchased some plans for the workbench online.There are plans and then there are plans. The plans for this workbench were quite well done. It is constructed of Knotty Alder for the framing and trim and ¾” MDF for the panels and shelves. As you might imagine this baby is heavy!! But, as you can see from the photos of the sides, the top and bottom are bolted together. Once the basic workbench was built in my shop all I had to do was take it apart (unbolt it), move the parts to the basement and bolt it together. I added the top and upper back portion to the workbench in the basement, but all of the construction was done in the shop.
That’s the overview of the workbench, now lets consider some of the details. After cutting most of the frame and trim parts to size I planed them down with my Ridgid 13” planer. Everything went pretty well. Knotty Alder is an inexpensive, medium density hardwood that works nicely. This workbench is not fine furniture, I didn’t need to buy expensive hardwood for it. So, Knotty Alder worked out really well. I have never used it before, but for an inexpensive project I recommend it. I got it at my local hardwood store, Colorado Lumber Specialties here in Colorado Springs. I ended up cutting out some of the worst of the knots. As is the usual for my projects, I bought about 20% more wood than indicated in the plans. Just the normal precautionary measure in my woodworking scheme of things.
The workbench plans recommend gluing up several of the parts, waiting for the glue to dry and then proceeding. However, I thought that was a little cumbersome so I glued up parts and used my Senco brad nailer to put things together. This saved me a lot of time. The pieces were nailed together, the glue would dry eventually and I could move on to the next step without much wait. I just ended up filling the nail holes later, no big deal since I did not choose to stain the wood, I left it unfinished. I used a Kreg shelf pin jig to do all the shelf pin holes in the sides. That is a cool tool, very easy to use.
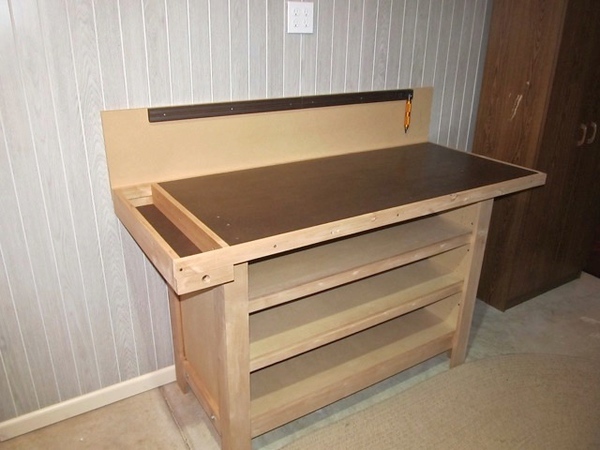
The plans recommend putting a sheet of ¼” hardboard over the top which is a great idea. It is not glued down, just attached with screws so it can be replaced if it gets damaged. The substrate for the hardboard is MDF. As you can see, there is a small tray for tools on the side of the bench, a very handy feature. The plans called for several bins that sit on the shelves, but I do not need them so I did not make them. The project plans call for a magnetized strip that runs across the back to hold some of your more commonly used tools. I bought those at Amazon, they just screw on, no glue.
I would estimate the overall cost of this project at around $200; a very worthwhile expense to have some kind of year round work space. If you needed a smaller workbench (this one is about 60” wide by 24” deep) I highly recommend this one, it looks good, is very sturdy and does not cost too much to build. Be sure and check out the photo gallery of the production process.
Doug